Friday, April 8, 2011

Easter Treats Part 1: Strata

Spring has sprung, which means it's time for beautiful weather, baseball, flowers, and if you are Italian....sweet desserts and egg-tastic meals! In the past few years I have highlighted some of the most traditional Italian Easter dishes - hame pie (pizza rustica), rice pie and Easter bread. This year I'm highlighting two recipes that put an alternative spin on traditional dishes.

This week we're making Strata, which is an egg-based breakfast meal. Similar to frittata, strata incorporates an egg batter with a choice of fillings including various meats, cheeses and vegetables. Unlike frittata, which is cooked in a deep-dish frying pan on the stove top, strata is baked in a 13x9 baking dish. There is also one additional key ingredient – a nice, crusty loaf of Italian bread, cut up into cubes. Assembly is quite simple. You do a layer of bread. then a layer of fillings, a second layer of bread, then finished up with the egg batter. Once baked, you end up with a hearty, delicious egg casserole that has the texture and consistency of bread pudding. The other beautiful thing about this dish is that you can prepare it up to 12 hours in advance. All you have to do when you wake up is pop it in the oven for an hour. It's the perfect meal when you're hosting a breakfast at your house. It leaves you plenty of time to sit, relax and share a cup of coffee with everyone else!

IT'S AN OMELETTE, RIGHT?
This is the question that I get asked constantly about frittata, ham pie and strata. In theory, yes they all can, and often do, share the same ingredients. But that's where the story ends. An omelette is all about the egg. You simply top it with your choice of ingredients, then fold the egg so that everything is contained inside the fold. I love me a good omelette, but we have the rest of the year for that. This time of year is about incorporating the sweet and spicy meats and the rich and sharp cheeses into the egg batter to make it all one.

SO IT'S JUST LIKE QUICHE, RIGHT?
In my opinion, quiche is again about the egg. The other ingredients are an an accent. The Easter pies, however, are about the ingredients working together as one. The egg's main role is to keep everything in its place. It's the glue to the creation. This is why my Mom always said, "give an Italian a few eggs and whatever leftover you have in the fridge, and you'll have yourself a new meal."

VARIETIES OF STRATA
There are endless ways to enjoy strata. You start with the three key ingredients: bread, eggs and milk. After that, the options for the filling are almost endless. You can do a traditional breakfast strata with sausage, bacon, ham and shredded cheese. Try classing it up a bit with prosciutto, pancetta and provolone! You can do spinach and feta (which, apparently, I have to make for my friend Elisa). You can go all veggie with peppers, mushrooms and asparagus. Or how about maple flavored sausage with some sprinkled cinnamon on top for a French Toast taste? And don't limit this dish to breakfast. Throw one together before you head out to work and heat it up for dinner. No matter what time of day, or what time of year, I guarantee you will enjoy this dish.

For my version of Easter Strata, I am using turkey sausage, green peppers, green onions, cherry tomatoes, parmesan and cheddar cheese (I felt that this was a good balance to the other Easter pies and cakes that I will also be making).

1 loaf crusty Italian bread, cut into 1 inch cubes
1 cup cooked turkey sausage, crumbled
1 green or red bell pepper, diced
1/4 cup green onions, sliced thin
1/2 cup grated parmesan cheese
6 large eggs
3 cups milk
2 teaspoons Italian seasoning
1/2 teaspoon salt
1/2 teaspoon black pepper
1 cup shredded cheddar cheese
1/2 cup cherry tomatoes, cut in half

Spray a 13x9 baking dish, place half of the bread pieces on the bottom of the dish.

Add the ground sausage, onions, peppers and parmesan cheese. Top with remainder of bread.

In a separate bowl, mix the eggs, milk, salt and pepper, and Italian seasoning. Pour on top of bread and filling mixture.

Push down lightly with a spatula so that the egg batter rises and coats all of the bread pieces.

Top with cheddar cheese and tomatoes.

Cover and refrigerate for at least 2 hours, up to 12 hours.

Place in oven at 350º for 1 hour.

Let stand for 10 minutes. Cut into squares and serve.

NEXT WEEK - EASTER TREATS PART 2: ITALIAN LOVE CAKE!

Monday, March 28, 2011

Swiss Chard and Beans with Seared Tuna


Like most kids, I was not a fan of veggies when I was young. Especially peas and broccoli. Actually, unless it was topped with cheese and sauce and ended with the letters "izza", I really wanted nothing to do with it.

Today I'm still not a big fan of peas or broccoli (luckily my kids are, thanks to my wife), but my love for leafy greens has grown tremendously. Broccoli rabe/bitter broccoli is one of my favorite side dishes to make. Sauté with a little garlic and oil, and you're good to go. I couldn't think of a better sandwich topper! Escarole, of course, is the key ingredient to our holiday soup. I've also had some fun experimenting with escarole (you can check out my other escarole recipes here). Spinach is an often go-to as well, although I prefer to eat it as a fresh salad. The fresh-to-wilted ratio after it cooks is almost heart-breaking.

This week, I'm using another favorite green in a very traditional, old world dish. Swiss chard is a leafy green that is somewhat similar to spinach. It has a slightly bitter taste and can be used raw in salads. However, when cooked it loses its bitterness for a more refined, delicate taste than spinach. It's also loaded with vitamins, fiber, minerals and protein. 

For this recipe, I'm going to sauté chopped swiss chard in some olive oil, garlic and onions. I'm adding one 15 oz can of white kidney beans and some salt and pepper to taste, then topping it with slices of seared tuna and fresh lemon juice. The slight bitterness of the greens, mixed with the flavors of the garlic and onion, the tang of the lemon and the creamy texture of the cooked beans is amazing. The end result is a delicious, earthy, rustic side dish. Now, if you're not a fan of tuna, grilled shrimp, steak or sausage will also work well. Or you can serve it without any additional topping as a side dish.

SWISS CHARD AND BEANS WITH SEARED TUNA
Serves two


1 bunch swiss chard, washed and chopped
1/4 cup white onion, chopped
2 cloves minced garlic
2 tbspn olive oil
1 15oz can of white kidney beans
1/4 cup warm water
salt and pepper to taste
1 fresh piece tuna steak

FIrst you'll want to sear the tuna (see directions below). When steak is done, place on a dish, cover loosely with aluminum foil and set aside.

In a large pan, sauté garlic and onions in olive oil until translucent. Add swiss chard leaves, beans and water. Cook until swiss chard is tender. Add salt and pepper to taste. Drain excess liquid. Place the swiss chard and beans on two plates. Slice the tuna into thin pieces, place on top of the chard and beans. Top with a squirt of fresh lemon juice. Serve with rustic bread.


DON'T FEAR THE SEAR!
Searing tuna sounds intimidating, but is actually very easy. Follow these simple steps, courtesy of ehow.com, and you'll be good to go!

1. Remove the tuna steak from the refrigerator. Allow the steak to sit out at room temperature for 1/2 to 1 hour before you begin cooking.

2. Use a paper towel to dry excess moisture from the tuna steaks. Simply pat the paper towel on both sides of the steak to remove marinade or condensation from the meat.

3. Add 2 tbsp. olive oil or butter to a pan over medium-high heat. Tilt the pan to spread the oil or butter across the surface and coat the pan.

4.  Place the tuna steak on the hot pan.

5. Sear each side for two minutes. Do not move the meat around too much while it sears. Gently shake the pan after two minutes, and if the tuna steak releases from the surface, you can flip it on its other side. It is important to make sure that the edged are seared, but you want the inside of the tuna steak 

6.  Make a small cut in the center of the tuna steak with a knife. Inspect the inside to make sure that the middle of the steak stays rare and red in color.

Sunday, March 20, 2011

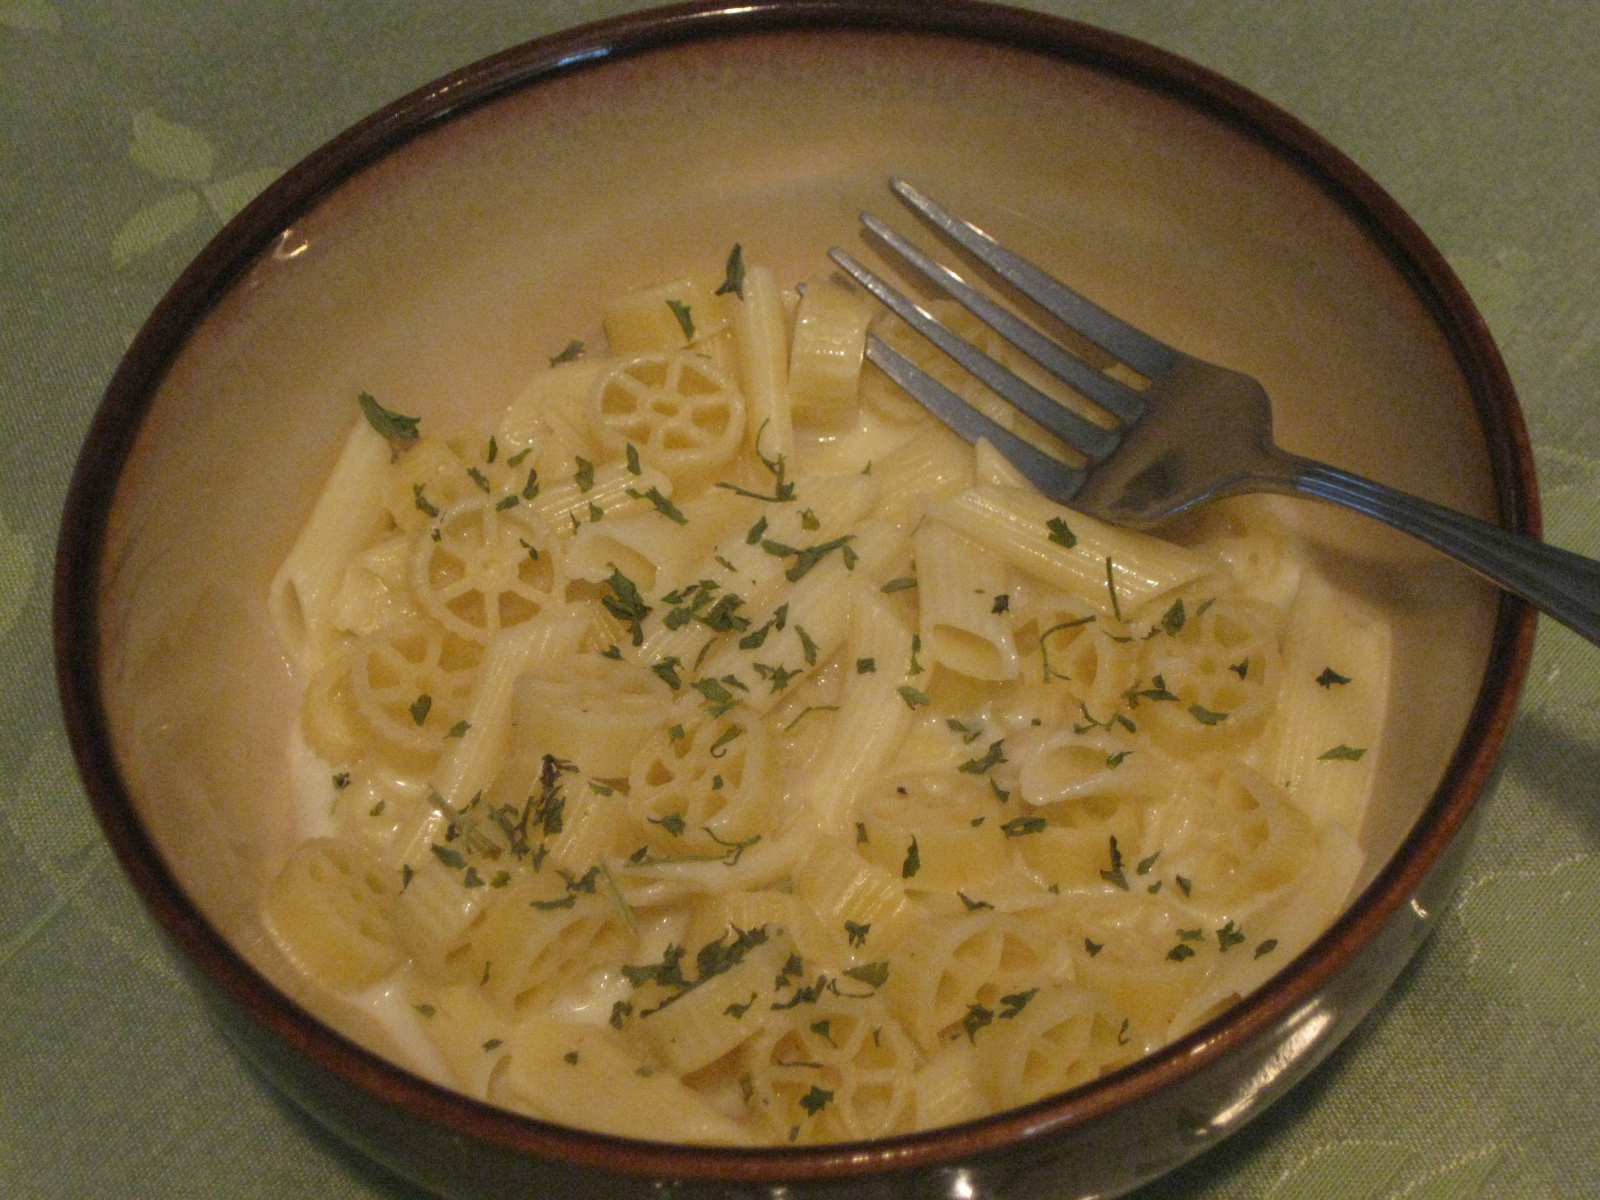
Julianna's Pasta with Garlic Cream Sauce

This week we're going back to the basics with a simple pasta dish that is my daughter Julianna's favorite meal. It's a simple dish that's very easy to make, and works great for an easy weekday meal. It's also a nice alternative to alfredo sauce - not as heavy, and with more of a garlic kick. 

Since Julianna asked that I share this recipe with you, I thought it would be best that she tells you all the great things about this dish!

So where did you learn about this pasta dish?
My  kindergarten aftercare teacher told me and my friend Maggie about it. But now I am in first grade.


What kind of pasta do you think works best with the sauce? 
The bowtie  pasta that my kindergarten teacher used. I think the wheel pasta will work too.


What do you like about the sauce?
The cream and the butter. Yummy!


Why do you think other kids would like this pasta?
Because it is really really really good. And they might like the same things about it what I like.


JULIANNA'S PASTA WITH GARLIC CREAM SAUCE

2 tbspn butter
3 cloves garlic, minced
2 tblspn flour
3/4 cup light cream or milk (cream will make it slightly thicker)
3/4 cup chicken broth
1/3 tspn dried parsley
salt and pepper to taste

In a medium sauce pan, heat butter until melted. Add garlic, sauté for one minute.
Add cream (or milk), chicken broth, flour and parsley. Stir. Cook and continue to stir over medium heat until hot, but not bubbly. Add salt and pepper to taste. Toss with cooked pasta. Top with grated parmesan cheese (the cheese is optional, as the sauce is creamy and flavorful on its own).

Wanna make it even tastier? Try adding some shrimp!


Sunday, March 13, 2011

Cooking with Guinness on Saint Patty's Day!

When my friend Alicia asked if I would be making something 'deliciously green' for Saint Patty's Day, I knew that I had to step up to the plate. Since Irish food is not my forté, my first thought was to put an Italian spin on a traditional dish. Instead of ham and cabbage, I was thinking broccoli rabe and pancetta. No doubt a delicious combination (and something that I could eat any day of the year), but I wanted it to be a bit more authentic for the occasion. I decided to go back to my St. Patty's day expertise...Guinness beer. 

Like all other stout beers, Guinness can be put to many uses, far beyond the day's toasting beverage of choice. Bernice Torregrossa, of The Galveston County Daily News, gives a perfect description of the many uses of stouts:  "Stout beer, made with darkly roasted barley and malt, is a versatile cooking ingredient. Its fermentation makes it a substitute for yeast in breads, the full-bodied taste adds depth to stews and soups, and the slightly bitter finish intensifies the flavor of chocolate in desserts."

With this in mind, I started to search out Guinness recipes on the web, and with just a few clicks came across huggingthecoast.com, which offers 22 Guinness recipes! The first recipe listed, Gourmet Guinness Burgers with Guinness Barbecue Sauce (courtesy of inspiredtaste.net), jumped out at me immediately. Burgers, which are a standard pub item, married with the flavor of Guinness...perfect!

I followed the recipe, step by step. No doubt, this is a great dish to celebrate the day! The richness of the beer really plays well with the beef, and gives the perfect kick to the sauce. It's the sauce that really blew me away with this burger. Even cooked at medium-well, this was one of the juiciest burgers that I've had in a long time. I would almost put this in a salisbury steak category, served on a toasty bun.

Guinness Burgers (4 burgers)
1 pound minced beef (80% lean, 20% fat)
1 egg, whisked
¼ cup Stout beer (Guinness)
1 Tablespoon olive oil, plus extra for brushing the grill
2 teaspoons mustard (Coleman’s Mustard)
1 clove garlic, minced
1/2 teaspoon salt
½ teaspoon black pepper
4 burger buns
Toppings: Guinness BBQ sauce, cheddar cheese, arugula, tomatoes and red onion

Preheat the grill or pan to medium.

Add beer, olive oil, mustard, garlic, salt and pepper to the beef then lightly mix with a fork. Do not over mix.

Separate the mixture into four portions, then lightly roll each portion into a ball and press down to make a burger patty.

Once preheated, lightly brush the grill with olive oil and place each burger patty down onto the oiled grill. Leave the patties for 4 minutes then flip and cook for another 4-5 minutes or desired doneness (4-5 minutes on each side should be cooked to medium).

Remove the patties from the grill and assemble each burger with desired toppings

Guinness BBQ Sauce (makes about 2 cups)
1 tablespoon olive oil
1 medium onion, small dice
1/4 cup molasses
1 12 ounce can stout beer (Guinness)
1/4 cup apple cider vinegar
1 can tomato puree (small can)
1 teaspoon red pepper flakes
1 tablespoon sugar
1 teaspoon salt
1/2 teaspoon pepper
1 teaspoon cumin

In a medium saucepan over medium heat add the olive oil and saute the onion until translucent, about 5 minutes.

 Add the molasses, beer, vinegar and tomato puree then stir to combine.

Add all of the spices and allow the sauce to simmer on the stove for about 20-25 minutes until it has reduced into a thick glossy BBQ sauce.

While simmering, keep an eye on the sauce and stir occasionally.

Special thanks to inspiredtaste.net, for allowing me to run their recipe on my blog.


Now that we've finished up with dinner, let's continue with the Guinness celebration as Emma Caperelli Loerky shares with us her recipe for Guinness Ice Cream!


This is the sixth recipe that I've submitted to Cucina Domenico, and the fact that this is the third time I'm using beer as a key ingredient is not lost on me. But St. Patty's Day is upon us and so that is my excuse this time (do we really need an excuse to cook/bake with beer anyway?). Next time I'll try to branch out and use a different type of booze. For now, let's get back to the beer. 

This past summer, after typing Guinness Beer in a Google search, I accidentally discovered that there are a plethora of recipes for ice cream using this dark, malty, bitter beer. I instantly knew I wanted to try it and began to search through the recipes for the one that sounded the most appealing to me. The problem was, I liked something about almost all of them. Some used chocolate as an accompaniment, others used molasses. There were a few that chose to use the beer as the main focus without any additional flavors. 

The recipe that appeared to suit my taste the most was the one taken from here: http://www.boston.com/ae/food/articles/2006/01/18/guinness_ice_cream/. It had a nice mix of beer and molasses and not too many egg yolks. What it didn't have was chocolate and pretzels, which seemed mandatory in my opinion. I pretty much followed this recipe exactly. The only modifications I made were adding some chocolate covered pretzels at the end of churning my ice cream, omitting the vanilla extract, and, in it's place, using a whole vanilla bean instead of just half. I bought milk chocolate covered pretzels thinking it would make my life a little easier, but, after some thought, I decided to coat them again using dark chocolate. Why? Because I was afraid that if I didn't coat them a second time, they would become mushy once mixed with the ice cream. Well, that and I thought that the dark chocolate would be a nice touch, and it was. The salt on the pretzels made for a nice contrast as well. If this seems too daunting, feel free to skip this step all together. Just bash up some store bought chocolate covered pretzels and be done with it. 


Guinness Ice Cream w/ Chocolate Covered Pretzels
Adapted from The Boston Globe
Ingredients
1 vanilla bean, split lengthwise 
1 cup whole milk
1 cup heavy cream
1/3 cup sugar
2/3 cup Guinness Stout 
2 tbsp plus 2 tsp molasses
4 egg yolks

About a half cup chocolate covered pretzel pieces 

Directions
I modified the way you make the custard using techniques I learned from the book, Frozen Desserts, by Williams-Sonoma. 

In a medium bowl, whisk the yolks and 1/2 cup of cream together vigorously until blended.

In a small saucepan, whisk together the stout and molasses. Bring to a boil over medium-high heat. Once it comes to a boil, remove from heat. 

Scrape the seeds from the vanilla bean into a medium saucepan. Add the bean, milk, sugar and remaining 1/2 cup of cream to the saucepan. Bring to a simmer over medium heat, stirring frequently with a wooden spoon. Once the mixture simmers, turn off the heat. 

Temper the yolks by whisking the eggs with one hand while adding about one-fourth of the warm cream mixture in a slow, steady stream. Slowly pour the warmed yolk mixture back into the pan, whisking until well blended. 

Slowly whisk the beer mixture into the cream mixture and cook over medium heat, stirring constantly with a wooden spoon, for about 6 minutes, or until the mixture coats the back of the wooden spoon. It should barely come to a simmer. Do not let it come to a boil so as not to curdle the eggs. 

Using a fine mesh strainer set over a medium bowl, strain the custard. 

Fill a large bowl halfway with ice cubes and fill with enough water to just cover the ice cubes. Place the bowl with the custard on top of the larger bowl with the ice cubes. Allow the mixture to cool, stirring occasionally, about 30 minutes.  

Once cooled, remove the custard from the ice-water bath. Place a piece of plastic wrap directly on the surface of the custard so that a "skin" doesn't form, and refrigerate for at least 3 hours or up to 24 hours. 

According to your ice cream maker's directions, churn the custard, adding the chocolate covered pretzels during the last few minutes.


Sunday, March 6, 2011

The Trials of Timbale: An Elaborate Eggplant Experience

Last week we hosted a family dinner to celebrate my Mom's birthday. As with previous family dinners, I planned on making a special dish that was equal parts taste and presentation. This year I really wanted to wow my Mom with one of her favorite foods, eggplant. I decided to make an Eggplant Timbale, which is made of of an outer shell of eggplant strips, stuffed with a pasta-based filling, then baked into a mold using a spring form pan. I remember first seeing this recipe done by Giada De Laurentiis, and knew that someday I would have to try out this amazing meal! 

I've been fortunate to have most of the recipes that I experiment with turn out the way that I had hoped, without any major fiascos. This time, not so much. Let me start from the beginning.....

When I decided to do this dish, I went searching online for a timbale recipe. As luck would have it, the first recipe that popped up was Giada's. I looked it over and felt comfortable with all of the steps. The only thing that I wanted to change was the pasta filling. Hers called for the addition of some meats (you can really go any direction you want with the filling....meats, veggies, cheeses). I wanted to stay away from meat in this dish, so I started to click through other timbale recipes. I found one that had the exact filling that I was looking for - chopped tomatoes, sautéed garlic and leeks, fresh herbs and ziti. Perfect! I check out the assembly steps on this version of the recipe. Piece of cake! On to the big day....

I stared prepping everything about three hours before dinner time. No rushing, just working at a nice and easy pace. I sliced up the eggplant and drizzled with olive oil, salt and pepper, and placed the first of three trays (you need a lot of eggplant for this) in the oven, just like the recipe that I was following had instructed. In 15 minutes, the slices should be ready to go. Just cool 'em and layer 'em in the pan! About 5 minutes in, I hear this crazy sizzling from the oven. I opened the oven door and what is supposed to be baked eggplant looks more like sizzling bacon, and quickly on it's way from crispy to blackened! Holy cow!!!! 

It didn't take me long to realize what went wrong. Fresh cut eggplant will soak up olive oil like a sponge, which can encourage someone to accidentally go overboard with the oil. Once the eggplant starts to cook, it will release the oil. This is a good method for on the grill, but when you do it in an oven like I was, the eggplant ends up frying itself in the released oils, and in this case burning to a crisp. We still had another two trays of fresh eggplant that needed to be prepared. My lovely wife played it cool and suggested that we just cook up the eggplant as is and serve it as a side with the pasta. Call me determined, or call me a hard-headed Calabrese, but I wasn't about to give up on this dish just yet.

First thing I did was run to the store to grab more eggplant. You need a good amount of eggplant slices for this dish. Since I already sacrificed 1/3 of my batch, I needed to replenish. I got home and started thinking to myself as I'm slicing, "why did this work so much easier for Giada?". Then, as I turned around, I saw it. Sitting there on my book shelf was my Giada cookbook. My AUTOGRAPHED Giada cookbook. I started searching through it. Could it be in here? Would it be in here? Bingo! Giada's timbale recipe, complete with step-by-step photographs. I skimmed through and found the answer...she grilled her eggplant strips! So the recipe that I was following did give poor instructions for the eggplant preparation, just as I thought. Sonofabitch!

I had no time to fire up my grill, so I did what I thought would be best. I started to brown the eggplants on my stovetop griddle. While this method did work better than in the oven, it was still a flat surface and would have caused the eggplant to fry in the released oils if I didn't pay close attention. A stovetop grill grate would have been ideal to allow the oils to drip away from the eggplant, but I had to work with what was available.  Thirty minutes later, the cutlets were done and ready for assembly. Everything was layered and put together in the spring form pan, and into the oven it went. I was still on schedule! But as it was cooking, I could still hear sizzling sounds coming from the oven. I checked it out and found drips of oil coming from the bottom of the pan. The eggplants were still releasing some of the retained oil! Why didn't I look at Giada's book from the beginning!!!! All I could do now was hope that the eggplant would dry out just enough while it baked.

I removed the pan from the oven. Looked good, smelled good, didn't feel too mush on top. We called everyone to sit down for the big presentation. I placed my presentation dish (a glass cake dish) on top of the pan, face down. Gently flipped it, gave the pan a little wiggle, and out with ease slid the timbale from the pan onto the dish...and then off of the dish and onto our kitchen counter top. SPLAT! One big, hot pile of steaming pasta with an eggplant crust plopped all over the counter. As I scramble to grab a spatula to stop it from falling onto the floor, CRASH goes the cake plate all over the floor. After a few four letter words to accompany the scooping and sweeping, I just started to laugh. It's all I could do. It was simply a case of TMO (Too Much Oil).

Luckily our counter tops were just wiped and cleaned before this fiasco. I quickly scooped it all into a beautiful pasta serving dish, mixed it all together and served with a big smile on my face. In typical motherly fashion, my Mom insisted that the meal was out of this world and it didn't matter what it looked like. Since everyone had a few servings, I'll accept that compliment. But don't let this happy ending fool you...I'm still a stubborn, hard-headed Calabrese and I will tackle this dish again. And I will be sure to fire up my grill and follow Giada's recipe from step one!

To see Giada De Laurentiis' Timbale recipe, click here .

Friday, March 4, 2011

Justice Prevails!

It was brought to my attention earlier this week that, along with two other blogs, Cucina Domenico was was being ripped off. Apparently a fraudulent food blog was copying, word for word, our stories and recipes. Sure, some may say that this is a form of flattery. However, the site was so poorly put together, that it was more of an embarrassment.

After letting off some steam, my co-bloggers and I banded together and took action with the upper hands at Google. I am happy to say that as of today the fraudulent blog has been nabbed and put to a halt. Two points for karma!

Special thanks to my co-bloggers at http://www.guidetolifeforwomen.com/  and http://earthmother-intheraw.blogspot.com/ for bringing this to my attention and helping get the matter resolved.

To those of you who may have been misled to this fraudulent site, my sincerest apologies.

Friday, February 25, 2011

Cooking with Beer

Over the past few years, I have started to develop a taste and understanding for quality beers. Along with it has come the appreciation of pairing a good beer with food. Just as you would choose which wine to serve with you meal, a nice beer selection can often help accentuate the flavors of just about any dish. It's not uncommon for me to now consider what beer to order or serve before selecting or preparing my main course. Needless to say, I was very excited when my sister-in-law (a.k.a. my SIL) gave me a cookbook full of beer-based recipes. We're talking way more than just a hot dog beer boil here, people. Just as you would select the proper oil or vinegar as a liquid base, the style of beer that you use can help bring out a sweet maltiness to a sauce or a hoppy essence to a marinade. I'll be sure to share some recipes with you as I experiment with this book. Thank you SIL!

This week, my good friend Emma shares with us her own beer-infused recipe...Gluten-Free Beer Battered Onion Rings! Just the combination of beer and home-made onion rings alone is enough to make my mouth water. But to put the two together? Genius!!!

Also featured this week is a delectable recipe from the one and only Una Mamma Italiana, as she shares with us her recipe for Italian Herb Beer Bread. Be sure to check out the Una Mamma Italiana blog for this and many more creative and tasty dishes.

Mangia and enjoy!


GLUTEN-FREE BEER BATTERED ONION RINGS
By Emma Caperelli Loerky

A few weeks ago my husband celebrated his birthday. When I asked him how he'd like to spend his day, he immediately spewed off a dinner and dessert menu. The menu consisted of filet mignon, sauteed mushrooms, Caesar salad, onion rings, and for dessert he asked for a key lime pie. Since my husband has Celiac disease, I knew I'd need to make some adjustments, but I felt that all of the things on the menu seemed pretty doable. I had a recipe for Caesar dressing that I had been wanting to try (no dairy and no raw egg), gluten-free croutons couldn't be that hard (they weren't and they were delicious!), I've made mushrooms countless times, and my husband is in charge of grilling the steaks. Even the pie, without the dairy and gluten, didn't faze me. But the thought of making onion rings made me cringe.

You see, a few months ago I attempted to make gluten-free onion rings without success. They were greasy and gritty and I was in no rush to try my hand at making them again. However, being someone who adores onion rings, I completely understood how they would make this pretty basic dinner seem special, so I decided to try again. Am I glad I did! My experience making them this time was so much better than the last and the results were spectacular. Aside from the onion rings at my favorite BBQ joint, these were the best I've had. No lie.

The key is to have everything set up and ready to go. You want to make sure you have your oven preheated to 200 degrees (to keep the cooked onion rings warm while you are frying up the rest), a wire rack lined with paper towels close by, as well as a cookie sheet to transfer the freshly fried rings to the oven on. Oh, and lets not forget the batter and the onions themselves. It needs to be sort of an assembly line. Once that is accomplished, you want to make sure that you have your oil at the perfect temperature. If your oil isn't hot enough, they will end up greasy and inedible. If it is too hot, they will burn QUICKLY. Even at the right temperature, these cook very fast, so you don't want to let them out of your sight for very long. The time it takes you to transfer the rings to the oven is about all I would allow myself to be away from the frying pan. I used a cooking/candy thermometer to make sure that my oil was at the perfect frying temperature (365 degrees).  


I almost forgot to mention the dipping sauce, which complimented the onion rings perfectly. In a nutshell - MAKE IT! Do yourself a favor though, double the recipe. I certainly will next time. 

Both recipes are adapted from http://www.glutenfreecookingschool.com/archives/lazy-mans-beer-battered-onion-rings/ 


Ingredients
1 Large Vidalia onion (or other sweet onion)

Approximately 2 cups soy milk

2 tbsp lemon juice
**Note: If you aren't lactose intolerant, omit the soy milk and lemons and use buttermilk.


1 1/2 cups brown rice flour 

1 tsp salt
about
1/8 tsp black pepper
1 tbsp canola oil 

2 eggs, lightly beaten

3/4 cup Redbridge Beer **(This is the amount the original recipe calls for, however, I had to add at least and additional 1/4 cup, possibly 1/2 cup more in order to get the right consistency. Unfortunately, I didn't measure exactly how much I added. Start off with the recommended amount and slowly add more beer until it's a nice thick consistency, similar to a pancake batter.)


Vegetable oil (for frying) 


Directions
Mix together the lemon juice and soy milk and let stand while you slice the onions into rings about 1/2 inch wide. Soak the onions in the soy milk mixture (or buttermilk) for about an hour in the fridge. Make the beer batter by mixing all remaining ingredients, adding as much beer as described above. Let the batter rest in the fridge while the onions soak. 


After about an hour, heat enough vegetable oil to coat a large frying pan (or cast iron skillet) by about 1 inch. The temperature should read 365 degrees on a thermometer. Drain the onions in a colander while waiting for the oil to come to temperature. When the oil is ready, dip the onion rings, one at a time, into the batter and gently lower them into the hot oil. Do not overcrowd the pan. After approximately 3 minutes, flip the rings and cook on the other side for about another 3 minutes. They should be a light golden color when finished. Transfer the rings to a wire rack lined with paper towels to drain the excess oil and sprinkle with additional salt while they are still hot. Repeat with the remaining onions, keeping the cooked onion rings warm in the oven.


Creamy Wasabi Dipping Sauce 


Ingredients
1/4 cup mayonnaise 

1/4 cup sour cream or plain yogurt (I couldn't find plain soy yogurt, so I just used 1/2 cup mayonnaise)
2 heaping tsp ketchup
1 heaping tsp tomato paste 

1 tsp Wasabi paste (I used a bit more) 

Dash of Tabasco sauce (This was a last minute addition made my me but can be omitted) 

Salt, black pepper, and cayenne pepper to taste


Mix all ingredients together thoroughly and enjoy.


ITALIAN HERB BEER BREAD
By Una Mamma Italiana


Most simple Italian recipes stem from the poor regions of Italy, where they cooked with whatever foods grew regionally. I'm talking about authentic Peasant Food, which happens to be my FAVORITE way to eat Italian. Don't get me wrong, I can appreciate gourmet Italian fare, but I grew up on the simple flavors of Italian cooking straight from the garden. This is one of those recipes.

Ingredients 
3 cups flour
1 Tbsp baking Powder
2 tsp garlic powder
1 tsp sugar
1 tbsp Italian Seasoning
2 tsp salt
12 z. beer

Directions
Mix all dry ingredients. Add the beer and stir (dough will be slightly wet, like a biscuit dough). Place dough in a well oiled loaf pan. Brush the top with Extra Virgin Olive Oil. Bake at 350 degrees for 45 minutes. Once it comes out of the oven, brush the top with e.v.o.o. again and sprinkle with sea salt. Let cool for 10 minutes, then slice.


BONUS RECIPE!!!

As coincidence may have it, Una Mamma has also posted a tasty Onion Ring recipe this week on her blog. Since I was FINALLY able to put an end to her ongoing food challenge victories, I thought it would only be appropriate that I share with you the link to her Italian Fried Onion Rings as well. Enjoy!